Table of Contents
Installing a Printer on Ubuntu
Overview
This article describes how to install a printer on a computer running Ubuntu.
Applies To
Users installing a Science Technology Services-managed printer on a computer running Ubuntu.
Prerequisites
Install the printer driver appropriate to the printer you are installing before following these instructions. Instructions for doing so can be found by clicking on the printer you are installing in the printer list. Install the prerequisite packages (current as of Ubuntu 20.04):
sudo apt update
sudo apt install -y smbclient python3-smbc libkadm5srv-mit11 libkadm5clnt-mit11
Process
1. Select the Activities menu in the top-left corner of the screen (or the Ubuntu logo in the toolbar) and search for printer. Click Printers. |  |
| 2. In the Printers dialog, click Additional Printer Settings. Note: If you have existing printers listed in this dialog, you will need to scroll to the bottom to see the Additional Printer Settings button. | 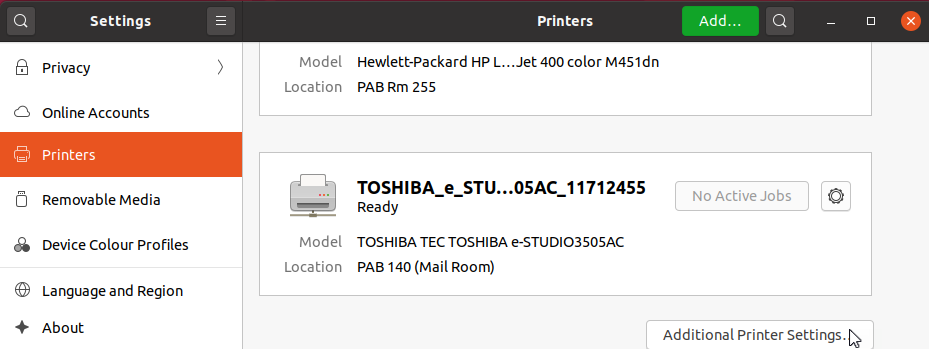 |
| 3. Click Add in the toolbar. | 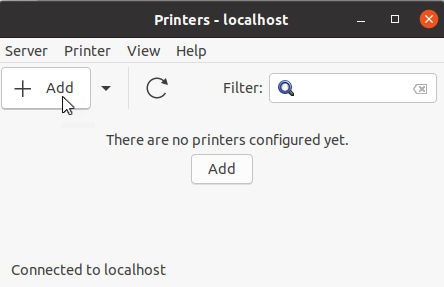 |
| 4. From the left pane, select Network Printer > Windows Printer via SAMBA. | 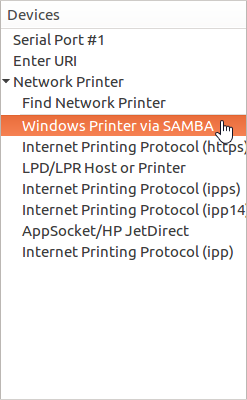 |
| 5. In the right pane, enter the Samba URL for the printer you are installing in the SMB Printer field. You can obtain this by clicking on the printer you are installing in the printer list. Leave Authentication set to Prompt user if authentication is required. If you specify your username and password here, your credentials will be stored in plain text on your computer and will be accessible to anyone with root access to your system. Click Forward. | 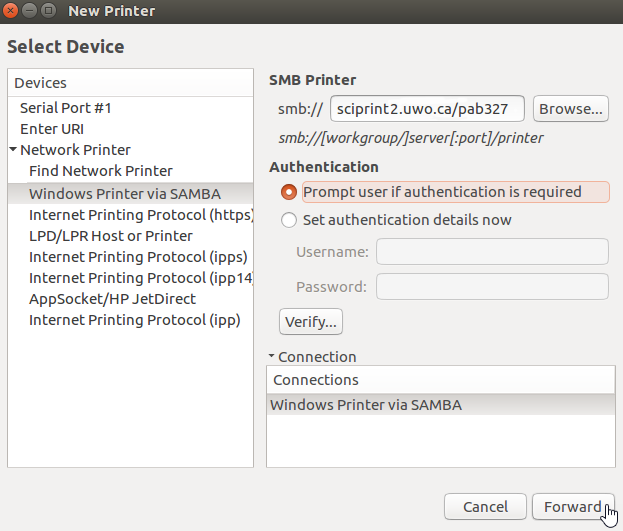 |
| 6. Select the manufacturer of the printer you are installing and click Forward. You can find the manufacturer by clicking the printer you are installing in the printer list. | 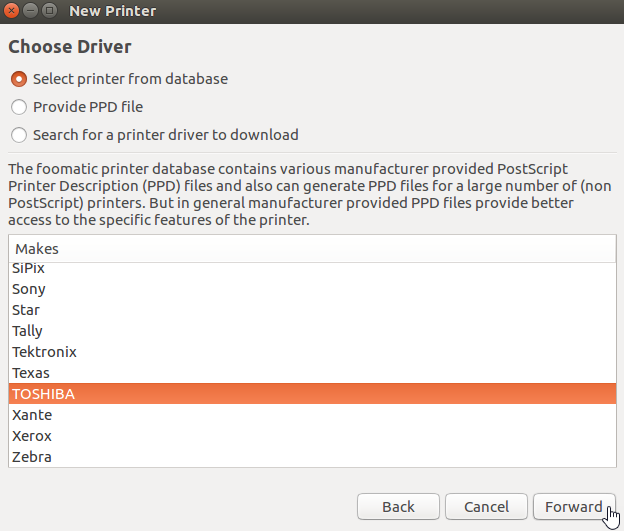 |
| 7. Select the appropriate driver for the printer you are installing and click Forward. You can determine the correct driver by clicking on the printer you are installing in the printer list. | 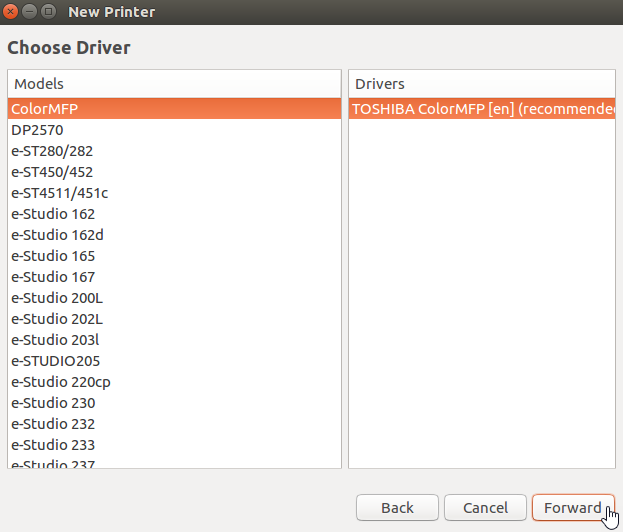 |
| 8. If prompted for printer options, make the selections appropriate to the printer you are installing and click Forward. You can determine the correct options to select by clicking on the printer you are installing in the printer list. | 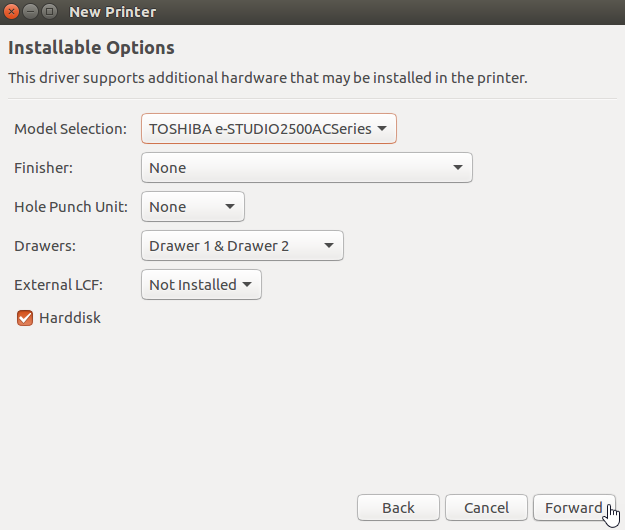 |
| 9. Enter a short name for the printer in the Printer Name field. Note that this name cannot have spaces or special characters. If desired, enter a description and location for the printer and click Apply. | 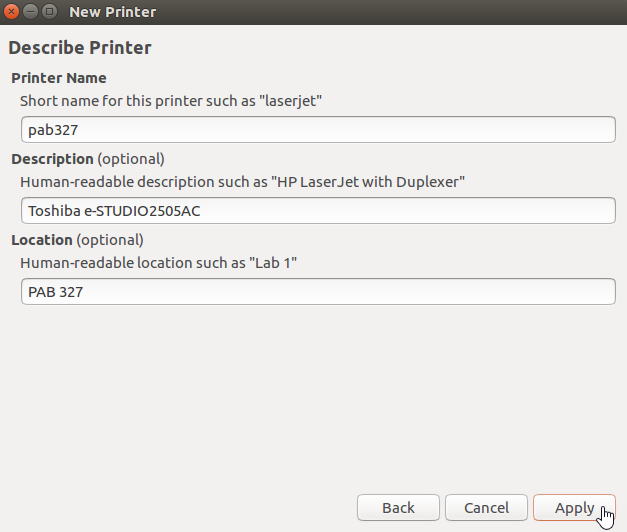 |
| 10. When prompted to print a test page, click Cancel. | 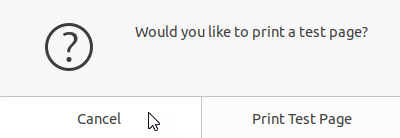 |
| 11. Right-click on an empty area on the desktop and select Open in Terminal. | 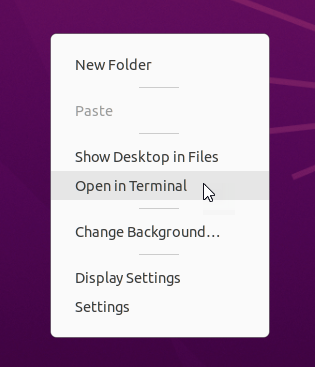 |
| 12. Paste the following commands to ensure that authentication works correctly with the newly-installed printer. You will be prompted to enter your password for your account on the PC. | \\ sudo systemctl stop cups\\ sudo sed -i -e '/AuthInfoRequired/d' /etc/cups/printers.conf\\ sudo sed -i -e '/^UUID/ a AuthInfoRequired username,password' /etc/cups/printers.conf\\ sudo systemctl start cups\\ |
| 13. You may now try printing. Upon doing so, you should be prompted for your username and password. | 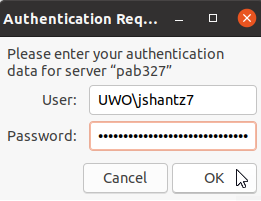 Be sure to enter your credentials as follows: Username: UWO\username Password: Your Western password Click OK. |
| 14. If you don't receive an authentication popup, you can authenticate by again opening the Printers dialog (see Step 1), and clicking the 1 Job button for your printer. | 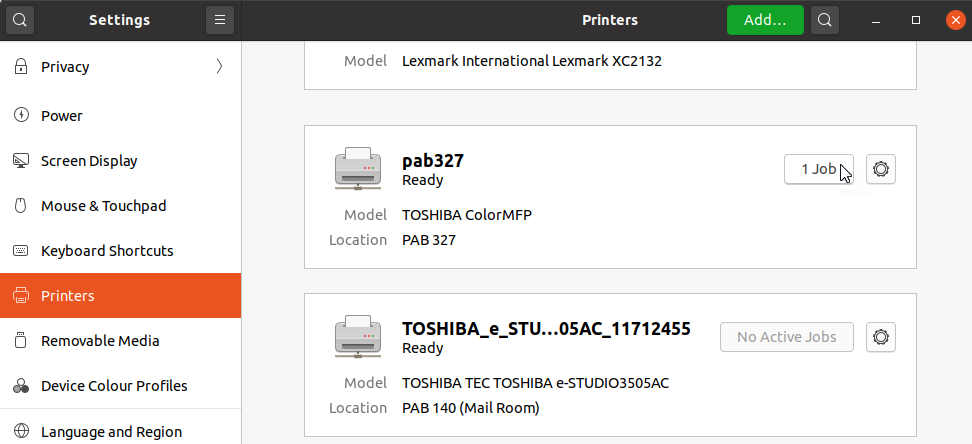 |
| 15. Click Authenticate. |  |
| 16. Enter your Western credentials as follows: | 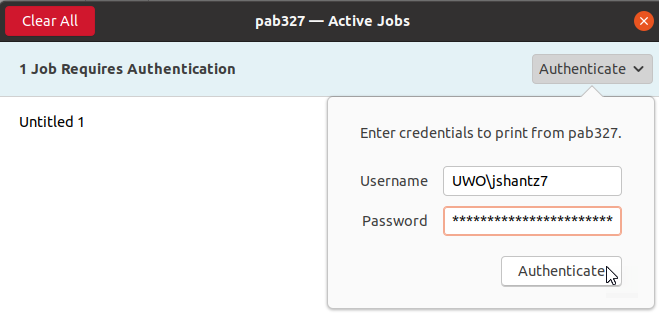 Username: UWO\username Password:Your Western password Click Authenticate. |
If printing is not working for you, be sure that you have completed the step in the Prerequisites section of this article to disable SMBv1. This step must be completed for printing to work.