Table of Contents
Installing an UNmanaged Printer on macOS
Overview
This article describes how to install a printer on a macOS computer.
PLEASE NOTE: some of these menus and screenshots will look different on your computer, depending on the version of MacOS you have installed.
Applies To
Users installing a network attached printer on a macOS computer. This applies to personal or lab printers that are NOT managed through PaperCut or a Department print server. This sets up a direct printer connection between your computer and the printers
Prerequisites
Install the printer driver appropriate to the printer you are installing before following these instructions. Note that a lot of printers will work with the “Generic Postcript Printer” driver.
You also need to know the IP number of your printer.
Process
| 1. Select the Apple menu and click System Preferences…. | 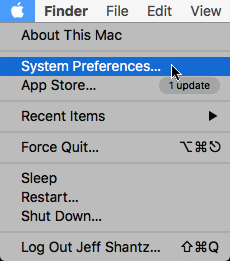 |
| 2. Select Printers & Scanners. |  |
| 3. Click the + button in the Printers & Scanners window to add a new printer. | 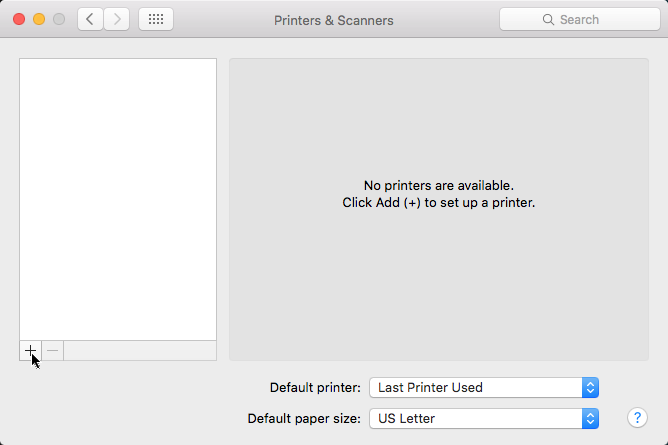 |
| 4. Select Add Printer or Scanner…. | 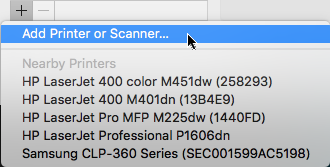 |
| 5. Right-click on an empty space in the toolbar of the Add window and select Customize Toolbar…. | 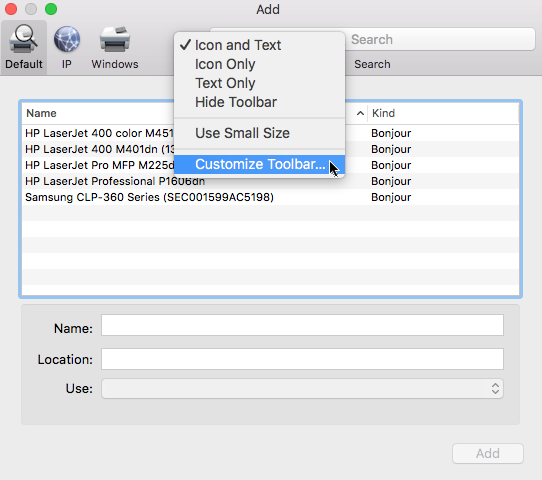 |
| 6. Drag the Advanced icon to the toolbar and click Done. | 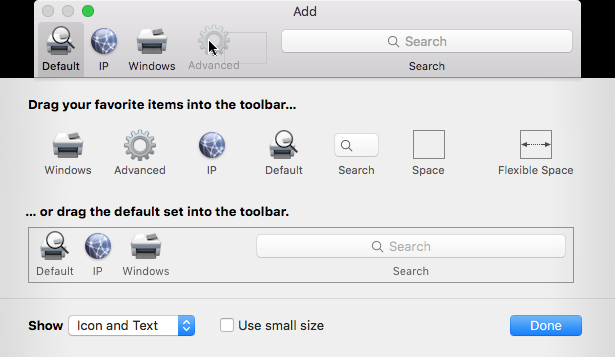 |
| 7. Select Advanced from the toolbar. |  |
| 8. Wait a moment until the search is complete. | 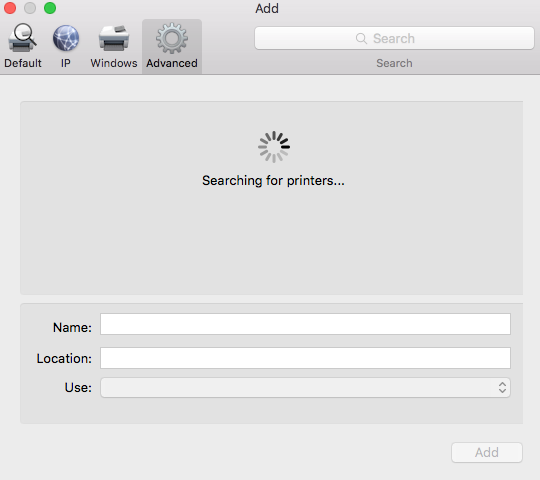 |
| 9. From the Type drop down list, select Internet Printing Protocol. In the URL field, enter the “ipp://” followed by the IP number of printer you are installing. In the Name field, enter a name for the printer. If desired, enter the location of the printer in the Location field. | 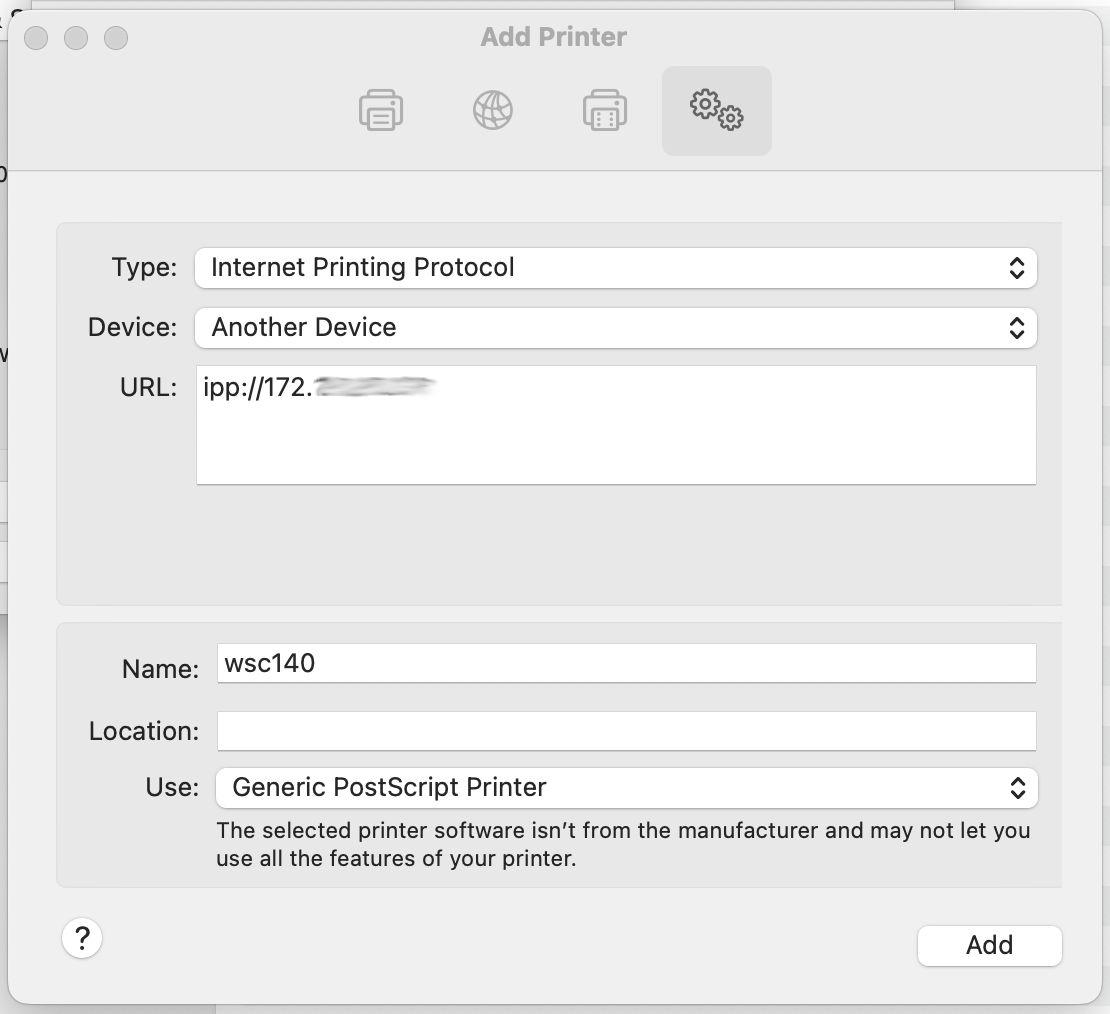 |
| 10. From the Use drop down list, select Select Software…. |  |
| 11. Select the appropriate driver for the printer you are installing and click OK. You can determine the correct driver by clicking on the printer you are installing in the printer list. | 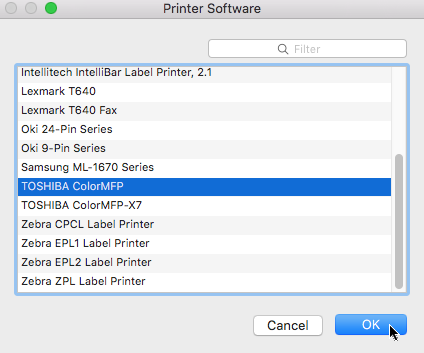 |
| 12. Click Add. |  |
| 13. If prompted for printer options, make the selections appropriate to the printer you are installing and click OK. | 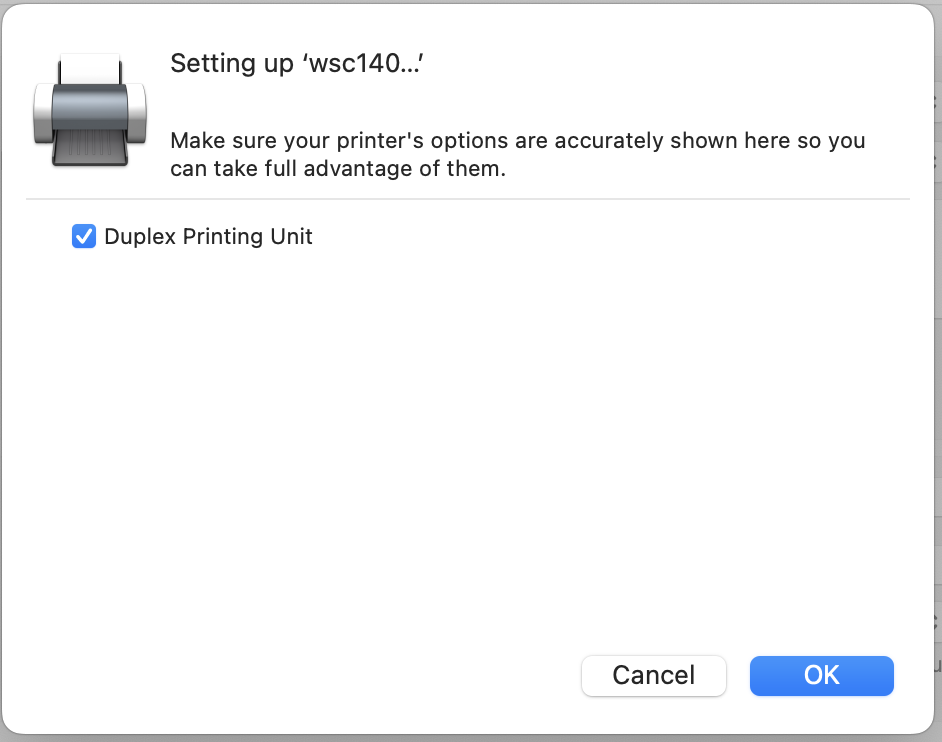 |